CodeIgniter 4 CRUD チュートリアル
このチュートリアルではCodeIgniter4でのCRUD(クラッド)オペレーションの使い方を解説しています。シンプルなユーザーリストを作成します。
CodeIgniter4のダウンロード
このチュートリアルでは名前とメールアドレスだけのシンプルなユーザーリストを作成していきます。サーバーはXAMPPを使用します。Intl Extensionを有効にしておく必要があります。また、CodeIgniter4のダウンロードにはComposerを使用しますので事前にインストールしておきます。
- XAMPPのインストール
- XAMPPの設定でIntl Extensionの有効化
- Composerのインストール
それではCodeIgniter4をダウンロードしていきます。XAMPPのhtdocsに移動しCLI(コマンドラインインターフェース)で下記コマンドを実行します。
composer create-project codeigniter4/appstarter crud-tutorial
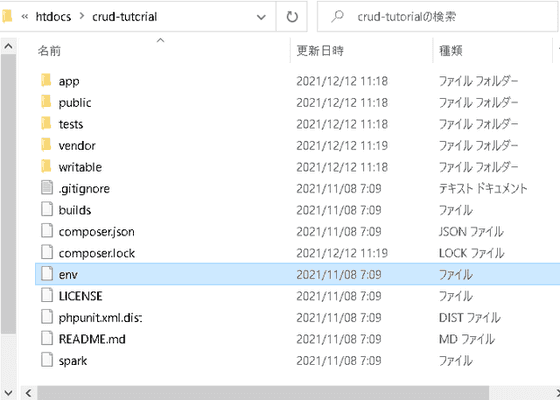
crud-tutorialの部分は任意の名前で問題ありません。htdocs内にフォルダが生成されCodeIgniter4のファイルがダウンロード��されます。
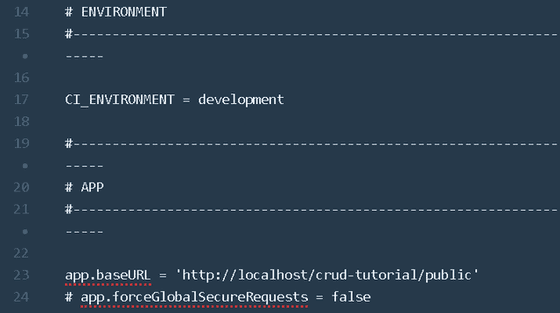
開発モードに設定していきます。テキストエディターでenvファイルを.envにリネームしファイルを開きます。.envファイルは設定のショートカットファイルになります。はじめはすべての項目がコメントアウトされているので設定する項目のコメントをはずして使用します。CI_ENVIRONMENTをproductionからdevelopmentに変更し、app.baseURLを'http://localhost/crud-tutorial/public'に設定します。
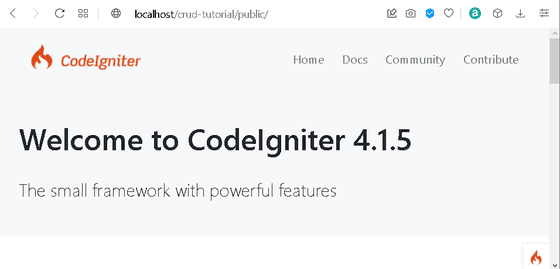
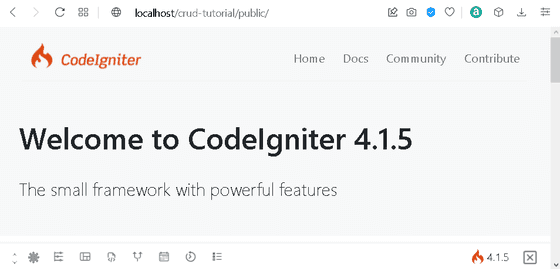
XAMPPのコントロールパネルからApache起動してブラウザでhttp://localhost/crud-tutorial/public/にアクセスすると右下にCodeIgniterのロゴが確認できます。これをクリックすると開発モードのツールバーが表示されます。
これで開発の準備が整いましたので次にデータベースを準備していきます。
データベースの作成と接続設定
アプリケーション用のデータベースを作成します。このチュートリアルではベータベース名をtestdbに、テーブル名はusersにします。phpMyaAminを起動して、まずデータベースを作成します。
CREATE DATABASE testdb;
次にテーブルを作成しましょう。

usersテーブルの作成
CREATE TABLE `testdb`.`users`
( `id` INT NOT NULL AUTO_INCREMENT ,
`name` VARCHAR(255) NOT NULL ,
`email` VARCHAR(255) NOT NULL ,
PRIMARY KEY (`id`))
ENGINE = InnoDB CHARSET=utf8mb4 COLLATE utf8mb4_general_ci;
idの型はINT、nameとemailの型はVARCHARにしています。サンプルデータをいくつか登録しておきましょう。今回は下記のようにデータを入れておきます。
usersテーブルにサンプルデータを作成
INSERT INTO `users` (`id`, `name`, `email`) VALUES
('1', '天智天皇', 'akinotano@example.com'),
('2', '持統天皇', 'harusugite@example.com'),
('3', '柿本人麿', 'ashibikino@example.com');
データベースが作成できたのでCodeIgniter4で接続するために.envファイルのデータベースの項目を設定します。
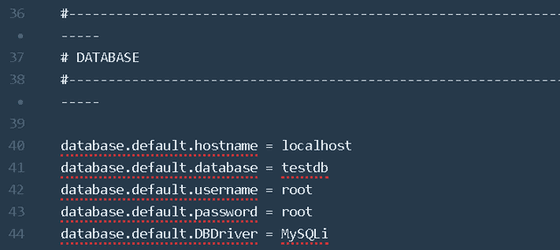
ホスト名、データベース名、ユーザー名、パスワードはそれぞれの環境にあわせて変更してください。これでデータベースの設定も完了です。次はModel(モデル)ファイルの作成です。
Model(モデル)ファイルの作成
モデルはデータを管理するクラスです。UserModel.phpファイルを作成しますがここでもCLIを使用します。もちろんテキストエディターで一から作成しても問題ありませんがCodeIgniter4ではsparkコマンドが用意されているため簡単にモデルファイルを作成することができます。下記コマンドを実行します。
UserModel.phpの作成
php spark make:model User --suffix
このコマンドを実行すればapp/Models内にひな形が記載されたUserModel.phpが生成されるので必要な部分だけ修正します。$tableにデータベースのテーブル名を指定します。デフォルトでモデル名の複数形が記載されているので今回は変更不要です。テーブル名をモデル名の複数形以外にしている場合はそのテーブル名を記載します。$allowedFieldsにこのアプリケーションからの操作を可能にするフィールドを記載します。今回の場合はnameとemailを指定します。
app/Models/UserModel.php
<?php

namespace App\Models;

use CodeIgniter\Model;

class UserModel extends Model
{
    protected $DBGroup          = 'default';
    protected $table            = 'users';
    protected $primaryKey       = 'id';
    protected $useAutoIncrement = true;
    protected $insertID         = 0;
    protected $returnType       = 'array';
    protected $useSoftDeletes   = false;
    protected $protectFields    = true;
    protected $allowedFields    = ['name', 'email'];

    // Dates
    protected $useTimestamps = false;
    protected $dateFormat    = 'datetime';
    protected $createdField  = 'created_at';
    protected $updatedField  = 'updated_at';
    protected $deletedField  = 'deleted_at';

    // Validation
    protected $validationRules      = [];
    protected $validationMessages   = [];
    protected $skipValidation       = false;
    protected $cleanValidationRules = true;

    // Callbacks
    protected $allowCallbacks = true;
    protected $beforeInsert   = [];
    protected $afterInsert    = [];
    protected $beforeUpdate   = [];
    protected $afterUpdate    = [];
    protected $beforeFind     = [];
    protected $afterFind      = [];
    protected $beforeDelete   = [];
    protected $afterDelete    = [];
}
これでUserModel.phpの完成です。なお不要な記載を削除して下記にようにしても問題ありません。
app/Models/UserModel.php
<?php

namespace App\Models;

use CodeIgniter\Model;

class UserModel extends Model
{
    protected $table            = 'users';
    protected $primaryKey       = 'id';
    protected $allowedFields    = ['name', 'email'];
}
データベーステーブルのプライマリーキーをid以外にしている場合は$primaryKeyをそれに合わせて指定しましょう。それでは次にController(コントローラ)ファイルを作成していきます。
Controller(コントローラ)ファイルの作成
コントローラはどのデータをどのView(ビュー)に受け渡すかを規定するクラスです。アプリケーションのコアの部分となります。UserController.phpを作成します。こちらもsparkコマンドでまずひな形を作成します。
UserController.phpの作成
php spark make:controller User --suffix
app/Controllers内に作成されたファイルはこのようになっています。
app/Controllers/UserController.php
<?php

namespace App\Controllers;

use App\Controllers\BaseController;

class UserController extends BaseController
{
    public function index()
    {
        //
    }
}
ここに必要なメソッドを作成していきます。今回は下記の7つのメソッドを作成します。
- index() ユーザーの一覧を表示
- show() ユーザーのひとつを詳細表示
- new() ユーザーの作成画面に移動
- new() ユーザーの作成画面に移動
- edit() 既存のユーザー情報の修正画面に移動
- update() 既存のユーザーの修正した情報をデータベースに保存
- delete() ユーザーの削除
下記のようになります。
app/Controllers/UserController.php
<?php

namespace App\Controllers;

use App\Controllers\BaseController;
use App\Models\UserModel;

class UserController extends BaseController
{
    public function __construct()
    {
        helper(['form','url']);
        $this->session = ConfigServices::session();
    }

    public function index()
    {
        $userModel = new UserModel();
        $data['users'] = $userModel->orderBy('id','DESC')->findAll();
        return view ('users/index', $data);
    }

    public function show($id = null)
    {
        $userModel = new UserModel();
        $data['user'] = $userModel->find($id);
        if ($data['user']) {
            return view('users/show', $data);
        }
        else {
            return redirect()->to(base_url('/users'));
        }
    }

    public function new()
    {
        return view('users/create');
    }

    public function create()
    {
        $input = $this->validate([
            'name'=> 'required',
            'email'=> 'required|valid_email'
        ]);

        if (!$input) {
            return view('users/create',[
                'validation' => $this->validator
            ]);
        }

        $userModel = new UserModel();
        $userModel->save([
            'name' => $this->request->getVar('name'),
            'email' => $this->request->getVar('email')
        ]);
        session()->setFlashdata('success','ユーザーが追加されました。');
        return redirect()->to(base_url('/users'));
    }

    public function edit($id = null)
    {
        $userModel = new UserModel();
        $data['user'] = $userModel->find($id);
        if ($data['user']) {
            return view('users/edit', $data);
        }
        else {
            session()->setFlashdata('faild', '該当するユーザーデータがありません。');
            return redirect()->to(base_url('/users'));
        }
    }

    public function update($id = null)
    {
        $input = $this->validate([
            'name'=> 'required',
            'email'=> 'required|valid_email'
        ]);

        if (!$input) {
            return view('users/create',[
                'validation' => $this->validator
            ]);
        }

        $userModel = new UserModel();
        $userModel->save([
            'id' => $id,
            'name' => $this->request->getVar('name'),
            'email' => $this->request->getVar('email')
        ]);
        session()->setFlashdata('success','ユーザーデータが更新されました。');
        return redirect()->to(base_url('/users'));
    }

    public function delete($id = null)
    {
        $userModel = new UserModel();
        $userModel->delete($id);
        session()->setFlashdata('success', 'ユーザーデータが削除されました。');
        return redirect()->to(base_url('/users'));
    }
}
まずuse App/Models/UserModel;でUserModelを読み込む必要があります。
コンストラクタのhelper(['form','url']);でヘルパーファンクションを呼び出しています。これはCodeIgnite4で用意されている手続き型のファンクションが集まったライブラリです。
session()もいくつかのメソッドで使用するのでコンストラクタで先に宣言しています。
index()では$dataをindexビューに渡しています。idが新しいものから順になるようにしています。
show()では$dataをshowビューに渡しています。存在しないidが指定された場合にbase_url('/users')へリダイレクトするようにしています。
new()はcreateビューに遷移するためのメソッドです。
create()では$this->validateで入力された値を検証しデータベースに保存しています。$session->serFlashdataでセッションにデータを保持してbase_url('/users')へリダイレクトしています。
edit()、update()では該当するidにたいしてnew()、create()と同様の処理をおこなっています。
delete()では該当のidのデータを削除しbase_url('/users')へリダイレクトしています。
それでは次にView(ビュー)ファイルを作成する前にルーティングを設定しておきます。
Routing(ルーティング)の設定
ルーティングではどのURIにアクセスしたときにどのコントローラのどのメソッドを呼び出すかを規定します。app/Config/Routes.phpのRoute Definitions(ルート定義)の部分に下記のように記述します。
app/Config/Routes.php抜粋
$routes->get('users', 'UserController::index');
$routes->get('users/new', 'UserController::new');
$routes->post('users', 'UserController::create');
$routes->get('users/(:num)', 'UserController::show/$1');
$routes->get('users/edit/(:num)', 'UserController::edit/$1');
$routes->post('users/(:num)', 'UserController::update/$1');
$routes->get('users/delete/(:num)', 'UserController::delete/$1');
それではView(ビュー)ファイルを作成していきます。
View(ビュー)ファイルの作成
このチュートリアルではView Layouts(ビューレイアウト)というシステムを使用してView(ビュー)ファイルを構成していきます。ビューレイアウトでは各ビュー共通の要素をベースとなるファイルに作成し、それぞれのビュー独自の内容を埋め込んでいくかたちになります。
app/Viewフォルダ内にサブフォルダのlayoutsとusersを作成し下記の構成にします。
- layouts
- base.php
- users
- create.php
- edit.php
- index.php
- show.php
base.phpにusers内のすべてのビューに共通する内容を記述します。users内の各ビューではbase.phpを呼び出して使用します。それではまずbase.phpを作成します。
なおこのチュートリアルではアプリケーションの見た目を整えるためにCSSフレームワークのPico.css(https://picocss.com)を使用していきます。クラス名の記述が少なくコードの構成が確認しやすいのでおすすめですが、好みのCSSフレームワークを使用してもいいですし、使用しなくてもまったく問題ありません。
app/Views/layouts/base.php
<!DOCTYPE html>
<html lang="en" dir="ltr">
<head>
    <meta charset="utf-8">
    <meta name="viewport" content="width=device-width, initial-scale=1.0">
    <meta http-equiv="X-UA-Compatible" content="ie=edge">
    <title>CodeIgniter 4 CRUD チュートリアル</title>
    <link rel="stylesheet" href="https://unpkg.com/@picocss/pico@latest/css/pico.min.css">
</head>
<body>
    <div class="container">
        <h1>CodeIgniter 4 CRUD チュートリアル</h1>
        <?= $this->renderSection('content') ?>
    </div>
</body>
</html>
$this->renderSection('content')の部分に各ビュー独自の内容を埋め込んでいきます。それでは各ビューファイルを作成します。新規のユーザー情報を登録するcreate.phpを下記のように作成します。
<?= $this->extend('layouts/base'); ?>

<?= $this->section('content') ?>
<h3>ユーザーの登録</h3>
<?php $validation = ConfigServices::validation(); ?>

<a href="<?= base_url('users') ?>">ユーザーリストに戻る</a>

<form action="<?= base_url('users') ?>" method="post">
    <label for="name">名前</label>
    <input type="text" name="name" value="<?= set_value('name') ?>">
    <?php if ($validation->getError('name')): ?>
        <mark><?= $validation->getError('name') ?></mark>
    <?php endif; ?>

    <label for="emai">メールアドレス</label>
    <input type="text" name="email" value="<?= set_value('email') ?>">
    <?php if ($validation->getError('email')): ?>
        <mark><?= $validation->getError('email') ?></mark>
    <?php endif; ?>

    <input type="submit" value="登録">
</form>
<?= $this->endSection() ?>
既存のユーザー情報を修正するedit.phpを下記のように作成します。
app/Views/users/edit.php
<?= $this->extend('layouts/base'); ?>

<?= $this->section('content') ?>
<h3>ユーザー情報の修正</h3>
<?php $validation = ConfigServices::validation(); ?>

<a href="<?= base_url('users') ?>">ユーザーリストに戻る</a>

<form action="<?= base_url('users/'.$user['id']) ?>" method="post">
    <label for="name">名前</label>
    <input type="text" name="name"value="<?= set_value('name', $user['name']) ?>">
    <?php if ($validation->getError('name')): ?>
        <mark><?= $validation->getError('name') ?></mark>
    <?php endif; ?>

    <label for="emai">メールアドレス</label>
    <input type="text" name="email" value="<?= set_value('email', $user['email'] )?>">
    <?php if ($validation->getError('email')): ?>
        <mark><?= $validation->getError('email') ?></mark>
    <?php endif; ?>

    <input type="submit" value="更新">
</form>
<?= $this->endSection() ?>
ユーザーの一覧を表示するindex.phpを下記のように作成します。
app/Views/users/index.php
<?= $this->extend('layouts/base'); ?>

<?= $this->section('content') ?>
<h3>ユーザー一覧</h3>
<?php $validation = ConfigServices::validation(); ?>

<div>
    <?php if (session()->getFlashdata('success')): ?>
        <mark><?= session()->getFlashdata('success') ?></mark>
    <?php elseif(session()->getFlashdata('failed')): ?>
        <mark><?= session()->getFlashdata('failed') ?></mark>
    <?php endif; ?>
</div>

<br>

<a href="<?= base_url('users/new') ?>">ユーザーの追加</a>

<table>
    <thead>
        <tr>
            <th>Name</th>
            <th>Email</th>
            <th colspan="3">Action</th>
        </tr>
    </thead>
    <tbody>
        <?php if (count($users) > 0): ?>
            <?php foreach ($users as $user): ?>
                <tr>
                    <td><?= $user['name'] ?></td>
                    <td><?= $user['email'] ?></td>
                    <td><a href="<?= base_url('users/'.$user['id']) ?>">閲覧</a></td>
                    <td><a href="<?= base_url('users/edit/'.$user['id']) ?>">編集</a></td>
                    <td><a href="<?= base_url('users/delete/'.$user['id']) ?>">削除</a></td>
                </tr>
            <?php endforeach; ?>
        <?php else: ?>
            <tr>
                <td colspan="5">ユーザーデータがありません。</td>
            </tr>
        <?php endif; ?>
    </tbody>
</table>

<?= $this->endSection() ?>
ユーザーの一つを詳細表示するshow.phpを下記のように作成します。
app/Views/users/show.php
<?= $this->extend('layouts/base'); ?>

<?= $this->section('content') ?>
<h3>ユーザーの詳細データ</h3>

<a href="<?= base_url('users') ?>">ユーザーリストに戻る</a>

<ul>
    <li>ID:<?= $user['id'] ?></li>
    <li>名前:<?= $user['name'] ?></li>
    <li>メールアドレス:<?= $user['email'] ?></li>
</ul>

<?= $this->endSection() ?>
アプリケーションの実行
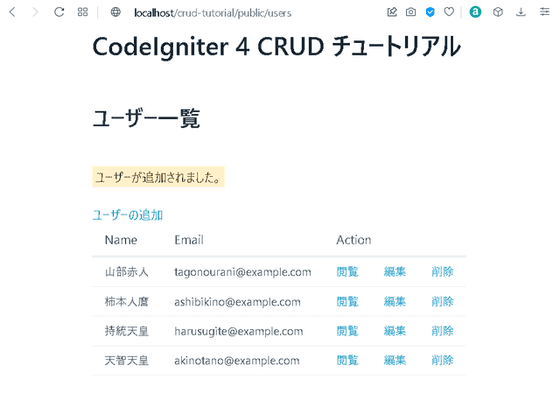
XAMPPでApacheとMySQLを起動し、ブラウザで http://localhost/crud-tutorial/public/usersにアクセスします。ユーザー一覧が表示されます。

ユーザーの追加から新規のユーザーを登録してみます。
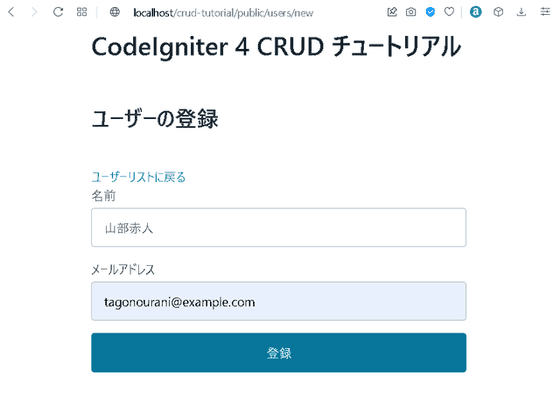
ユーザーが追加されメッセージが表示されます。
閲覧画面も確認しておきます。
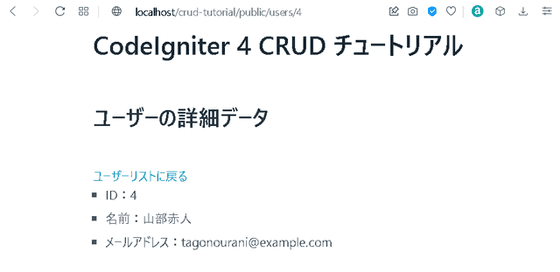
これでアプリケーションの作成完了です。
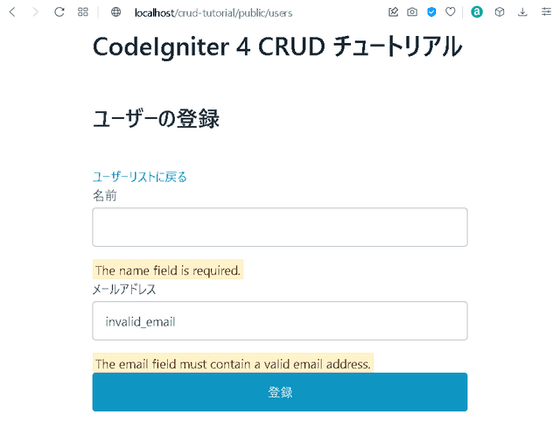
Validation(バリデーション)メッセージのカスタマイズ
最後になりますが、Validation(バリデーション)で表示されるメッセージを変更します。デフォルトでは下記のようなメッセージが表示されます。
UserControllerのcreate()とupdate()メソッドを下記のように変更してメッセージを日本語にします。
app/Controllers/UserController.php
<?php

namespace App\Controllers;

use App\Controllers\BaseController;
use App\Models\UserModel;

class UserController extends BaseController
{
    public function __construct()
    {
        helper(['form','url']);
        $this->session = ConfigServices::session();
    }

    public function index()
    {
        $userModel = new UserModel();
        $data['users'] = $userModel->orderBy('id','DESC')->findAll();
        return view ('users/index', $data);
    }

    public function show($id = null)
    {
        $userModel = new UserModel();
        $data['user'] = $userModel->find($id);
        if ($data['user']) {
            return view('users/show', $data);
        }
        else {
            return redirect()->to(base_url('/users'));
        }
    }

    public function new()
    {
        return view('users/create');
    }

    public function create()
    {
        $input = $this->validate([
            'name' => [
                'rules' => 'required',
                'errors' => [
                    'required' => '名前は必須項目です。'
                ]
            ],
            'email' => [
                'rules' => 'required|valid_email',
                'errors' => [
                    'required' => 'メールアドレスは必須項目です。',
                    'valid_email' => '有効なメールアドレスを入力してください。'
                ]
            ]
        ]);

        if (!$input) {
            return view('users/create',[
                'validation' => $this->validator
            ]);
        }

        $userModel = new UserModel();
        $userModel->save([
            'name' => $this->request->getVar('name'),
            'email' => $this->request->getVar('email')
        ]);
        session()->setFlashdata('success','ユーザーが追加されました。');
        return redirect()->to(base_url('/users'));
    }

    public function edit($id = null)
    {
        $userModel = new UserModel();
        $data['user'] = $userModel->find($id);
        if ($data['user']) {
            return view('users/edit', $data);
        }
        else {
            session()->setFlashdata('faild', '該当するユーザーデータがありません。');
            return redirect()->to(base_url('/users'));
        }
    }

    public function update($id = null)
    {
        $input = $this->validate([
            'name' => [
                'rules' => 'required',
                'errors' => [
                    'required' => '名前は必須項目です。'
                ]
            ],
            'email' => [
                'rules' => 'required|valid_email',
                'errors' => [
                    'required' => 'メールアドレスは必須項目です。',
                    'valid_email' => '有効なメールアドレスを入力してください。'
                ]
            ]
        ]);

        if (!$input) {
            return view('users/create',[
                'validation' => $this->validator
            ]);
        }

        $userModel = new UserModel();
        $userModel->save([
            'id' => $id,
            'name' => $this->request->getVar('name'),
            'email' => $this->request->getVar('email')
        ]);
        session()->setFlashdata('success','ユーザーデータが更新されました。');
        return redirect()->to(base_url('/users'));
    }

    public function delete($id = null)
    {
        $userModel = new UserModel();
        $userModel->delete($id);
        session()->setFlashdata('success', 'ユーザーデータが削除されました。');
        return redirect()->to(base_url('/users'));
    }
}
これでValidation(バリデーション)で表示されるメッセージが変更されました。

今回のチュートリアルは以上となります。いかがだったでしょうか?CodeIgniter4初心者の方の参考になれば幸いです。