three.jsを散策する③ プリミティブなジオメトリいろいろ(ボックス、サークル、コーン、シリンダー)
three.jsを学んでいくシリーズの3回目です。ボックス、サークル、コーン、シリンダーを描画してみます。また要素内でレスポンシブに描画する方法も確認します。
レスポンシブに描画する
three.jsの公式サイトのマニュアルを参考にいろいろなジオメトリを描画していきます。公式サイトを確認したい方は下記のリンクからどうぞ。
three.js manual Fundamentals Primitives
ルートフォルダにindex.htmlとmain.jsを作成します。今回は要素内でレスポンシブに描画できるように下記のように作成します。
index.html
<!DOCTYPE html>
<html>
  <head>
    <meta charset="UTF-8">
    <meta http-equiv="X-UA-Compatible" content="ie=edge">
    <meta name="viewport" content="width=device-width, initial-scale=1.0">//ビューポートの指定
    <title>three.js app</title>
    <script async src="https://unpkg.com/es-module-shims@1.6.3/dist/es-module-shims.js"></script>
    <script type="importmap">
     {
       "imports": {
	 "three": "https://unpkg.com/three@v0.155.0/build/three.module.js",
	 "three/addons/": "https://unpkg.com/three@v0.155.0/examples/jsm/"
       }
     }
    </script>
  </head>
  <body>
    <div id="canvas-container"></div>
    <script type="module" src="main.js"></script>
  </body>
</html>
viewport(ビューポート)を指定しています。次にmain.jsを下記のように作成します。#canvas-containerの幅に合わせて高さを調整するようにします。
main.js
import * as THREE from 'three';

const container = document.querySelector('#canvas-container');//描画先の要素を取得
let width = container.clientWidth;//幅の指定
let height =  container.clientWidth / 1.618;//幅に合わせて高さを指定

//シーン
const scene = new THREE.Scene();
scene.background = new THREE.Color(0xffffff);

//カメラ
const camera = new THREE.PerspectiveCamera( 75, width / height, 0.1, 1000 );
camera.position.z = 4;

//レンダラー
const renderer = new THREE.WebGLRenderer({ antialias: true });
renderer.shadowMap.enabled = true;
renderer.shadowMap.type = THREE.PCFSoftShadowMap;
renderer.setSize( width, height );
container.appendChild(renderer.domElement);

//リサイズの処理
function resize() {
    renderer.setSize(container.clientWidth, container.clientWidth / 1.618);
    camera.aspect = container.clientWidth / ( container.clientWidth / 1.618);
    camera.updateProjectionMatrix();
};
window.addEventListener("resize", resize);

//ジオメトリ
const geometry = new THREE.BoxGeometry( 1, 1, 1 );
const material = new THREE.MeshPhongMaterial({color: 0xdc143c});
const cube = new THREE.Mesh( geometry, material );
cube.castShadow = true;
cube.position.y = 0.6;
scene.add( cube );

//土台のジオメトリ
const planeGeometry = new THREE.PlaneGeometry(100, 100);
const planeMaterial = new THREE.MeshLambertMaterial({color: 0xffffff});
const plane = new THREE.Mesh(planeGeometry,planeMaterial);
plane.position.set(0, 0, -3);
plane.receiveShadow = true;
scene.add(plane);

//ライト
const light = new THREE.DirectionalLight(0xffffff, 6.0);
light.position.set(2, 1, 2);
light.castShadow = true;
scene.add(light);

//アニメーション
function animate() {
    requestAnimationFrame( animate );

    cube.rotation.x += 0.002;
    cube.rotation.y += 0.003;
    cube.rotation.z += 0.004;

    renderer.render( scene, camera );
}

animate();
カメラやジオメトリのポジションについては任意に指定しています。WebGLRendererのプロパティでantialiasをtrueに指定することで描画がきれいに表示されます。リサイズの処理の部分ですが、リサイズした際にcamera.updateProjectionMatrix()を呼び出す必要があるようです。描画はこんな感じになります。
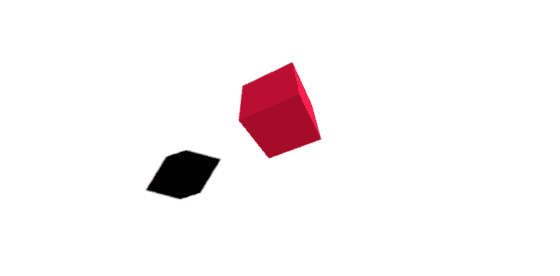
これで準備ができたのであとはジオメトリの部分を変更して描画していきます。アニメーションの部分の変数もメッシュに合わせて変更すればOKです。
ボックスジオメトリ BoxGeometry
ボックスジオメトリはこれまでの例で使用してきたおなじみの箱型の図形が描画できます。コンストラクタは下記のようになっています。
BoxGeometry(width : Float, height : Float, depth : Float, widthSegments : Integer, heightSegments : Integer, depthSegments : Integer)
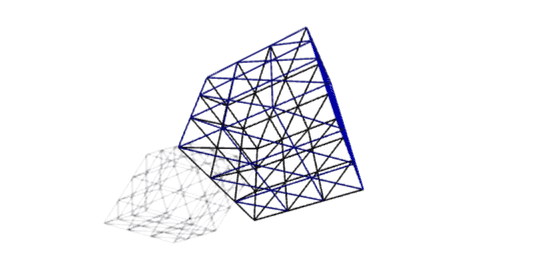
width(幅)、height(高さ)、depth(奥行)とそれぞれの分割数が指定できます。分割数を指定して下記のようにしてみます。
const geometry = new THREE.BoxGeometry( 1, 1, 0.5, 2, 1, 1 );
const material = new THREE.MeshPhongMaterial({color: 0x000080, wireframe: true});
const cube = new THREE.Mesh( geometry, material );
cube.castShadow = true;
cube.position.y = 0.6;
scene.add( cube );
区切り線がわかるようにマテリアルのwireframeをtrueにしてみました。
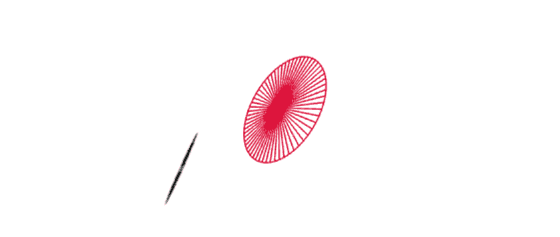
サークルジオメトリ CircleGeometry
サークルジオメトリは円形の図形が描画できます。コンストラクタは下記のようになっています。
CircleGeometry(radius : Float, segments : Integer, thetaStart : Float, thetaLength : Float)
radius(半径)、segments(三角形での区切数)、thetaStart(円の区切り初めの角度)、thetaLength(中心角)を指定できます。thetaStart、thetaLengthは半円など閉じていない円形を描画する際に使用します。今回は単純にradiusとsegmentsだけ指定してみます。
const geometry = new THREE.CircleGeometry( 1, 60 );
const material = new THREE.MeshBasicMaterial({color: 0xdc143c, wireframe: true});
const circle = new THREE.Mesh( geometry, material );
circle.castShadow = true;
circle.position.y = 0.5;
scene.add( circle );
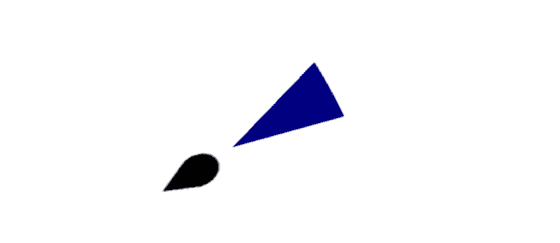
コーンジオメトリ ConeGeometry
コーンジオメトリは円錐形ですね。コンストラクタを確認しておきます。
ConeGeometry(radius : Float, height : Float, radialSegments : Integer, heightSegments : Integer, openEnded : Boolean, thetaStart : Float, thetaLength : Float)
radius(半径)、height(高さ)、radialSegments(放射状の区切り数)、heightSegments(高さの区切り数)、openEnded(底の開放)、thetaStart(円の区切り初めの角度)、thetaLength(中心角)が指定できます。底が閉じているシンプル円錐を描画してみます。
const geometry = new THREE.ConeGeometry( 0.5, 2, 32 );
const material = new THREE.MeshBasicMaterial({color: 0x000080});
const cone = new THREE.Mesh( geometry, material );
cone.castShadow = true;
cone.position.y = 0.5;
scene.add( cone );
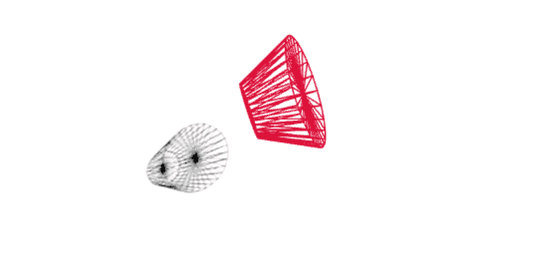
シリンダージオメトリ CylinderGeometry
シリンダージオメトリは円柱形ですね。コンストラクタを確認しておきます。
CylinderGeometry(radiusTop : Float, radiusBottom : Float, height : Float, radialSegments : Integer, heightSegments : Integer, openEnded : Boolean, thetaStart : Float, thetaLength : Float)
radiusTop(天面の半径)、radiusBottom(底面の半径)、radialSegments(放射状の区切り数)、heightSegments(高さの区切り数)、openEnded(底の開放)、thetaStart(円の区切り初めの角度)、thetaLength(中心角)を指定できます。天面と底面の半径が違うシンプルな円柱を描画してみます。
const geometry = new THREE.CylinderGeometry( 1, 0.5, 1, 30 );
const material = new THREE.MeshBasicMaterial({color: 0xdc143c, wireframe: true});
const cylinder = new THREE.Mesh( geometry, material );
cylinder.castShadow = true;
cylinder.position.y = 0.5;
scene.add( cylinder );