three.jsを散策する⑤ カメラをクルクル回すオービットコントロール
three.jsを学んでいくシリーズの5回目です。アドオンのひとつであるOrbitControls(オービットコントロール)の使い方を確認します。
three.jsの公式サイトのドキュメンテーションを参考にOrbitControls(オービットコントロール)の使い方を確認していきます。OrbitControls(オービットコントロール)は、マウスのスクロールやドラックといったユーザーコントロールに応じて、描画されたオブジェクトの軌道上のカメラの位置を操作できるthree.jsのアドオンです。公式サイトを確認したい方は下記のリンクからどうぞ。
index.htmlでアドオンを読み込む
いつも通りルートフォルダにindex.htmlとmain.jsを作成します。OrbitControls(オービットコントロール)を使用するにはindex.htmlでアドオンを読み込んでおく必要があります。
<script async src="https://unpkg.com/es-module-shims@1.8.0/dist/es-module-shims.js"></script>
    <script type="importmap">
     {
       "imports": {
	 "three": "https://unpkg.com/three@v0.156.1/build/three.module.js",
	 "three/addons/": "https://unpkg.com/three@v0.156.1/examples/jsm/"
       }
     }
    </script>
現在の最新バージョンにあわせてはv0.156.1の部分を変更していけばOKですね。index.htmlを下記のように作成します。
<!DOCTYPE html>
<html>
  <head>
    <meta charset="UTF-8">
    <meta http-equiv="X-UA-Compatible" content="ie=edge">
    <meta name="viewport" content="width=device-width, initial-scale=1.0">
    <title>three.js app</title>
    <script async src="https://unpkg.com/es-module-shims@1.8.0/dist/es-module-shims.js"></script>
    <script type="importmap">
     {
       "imports": {
	 "three": "https://unpkg.com/three@v0.156.1/build/three.module.js",
	 "three/addons/": "https://unpkg.com/three@v0.156.1/examples/jsm/"
       }
     }
    </script>
  </head>
  <body>

    <div id="canvas-container"></div>

    <script type="module" src="main.js"></script>
  </body>
</html>
index.htmlはこれだけで完成です。
main.jsの作成
main.jsを作成します。今回は描画サイズの高さを350に固定してみます。OrbitControls(オービットコントロール)をインポートする必要があります。
import { OrbitControls } from 'three/addons/controls/OrbitControls.js';
コンストラクタを確認しておきます。
OrbitControls( object : Camera, domElement : HTMLDOMElement )
main.jsを下記のように作成してみます。
import * as THREE from 'three';
import { OrbitControls } from 'three/addons/controls/OrbitControls.js';

//描画先とサイズを指定
const container = document.querySelector( '#canvas-container' );
let width = container.clientWidth;
let height = 350;

//レンダラー
const renderer = new THREE.WebGLRenderer({ antialias: true });
renderer.setSize( width, height );
container.appendChild( renderer.domElement );

//シーン
const scene = new THREE.Scene();
scene.background = new THREE.Color( 0xffffff );

//カメラ
const camera = new THREE.PerspectiveCamera( 45, width / height, 1, 10000 );
const controls = new OrbitControls( camera, renderer.domElement );
camera.position.set( 0, 0, 4 );
controls.update();

//リサイズの処理
function resize() {
    renderer.setSize( container.clientWidth, height );
    camera.aspect = container.clientWidth / height;
    camera.updateProjectionMatrix();
};
window.addEventListener( "resize", resize );

//ジオメトリ
const geometry = new THREE.IcosahedronGeometry( 1, 0 );
const material = new THREE.MeshBasicMaterial({ color: 0x008080, wireframe: true });
const icosahedron = new THREE.Mesh( geometry, material );
scene.add( icosahedron );

//アニメーション
function animate() {
    requestAnimationFrame( animate );

    controls.update();

    renderer.render( scene, camera );
}

animate();
const controls = new OrbitControls( camera, renderer.domElement )でインスタンス化しcontrols.update()を呼び出します。update()はカメラの位置が変わる度に呼び出す必要があるようです。描画はこんな感じになります。
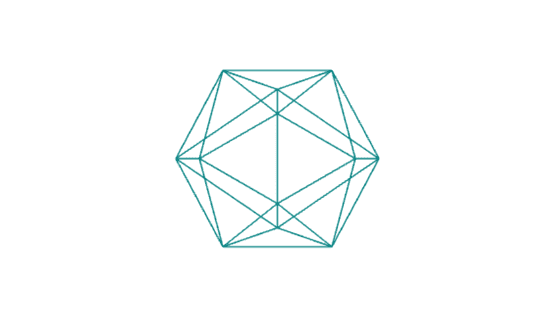
スクロールするとズームし、ドラックでカメラの位置を変えられます。

動作を確認する
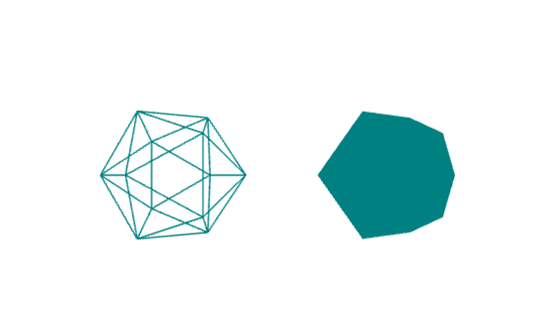
アニメーションを追記して動作を確認してみます。カメラの動きがわかりやすいようにジオメトリを2つにしてみます。main.jsを下記のように変更してみます。
import * as THREE from 'three';
import { OrbitControls } from 'three/addons/controls/OrbitControls.js';

//描画先とサイズを指定
const container = document.querySelector( '#canvas-container' );
let width = container.clientWidth;
let height = 350;

//レンダラー
const renderer = new THREE.WebGLRenderer({ antialias: true });
renderer.setSize( width, height );
container.appendChild( renderer.domElement );

//シーン
const scene = new THREE.Scene();
scene.background = new THREE.Color( 0xffffff );

//カメラ
const camera = new THREE.PerspectiveCamera( 45, width / height, 1, 10000 );
const controls = new OrbitControls( camera, renderer.domElement );
camera.position.set( 0, 0, 6 );
controls.update();

//リサイズの処理
function resize() {
    renderer.setSize( container.clientWidth, height );
    camera.aspect = container.clientWidth / height;
    camera.updateProjectionMatrix();
};
window.addEventListener( "resize", resize );

//ジオメトリ
const geometry1 = new THREE.IcosahedronGeometry( 1, 0 );
const material1 = new THREE.MeshBasicMaterial({ color: 0x008080, wireframe: true });
const icosahedron1 = new THREE.Mesh( geometry1, material1 );
icosahedron1.position.x = -1.5;
scene.add( icosahedron1 );

const geometry2 = new THREE.IcosahedronGeometry( 1, 0 );
const material2 = new THREE.MeshBasicMaterial({ color: 0x008080 });
const icosahedron2 = new THREE.Mesh( geometry2, material2 );
icosahedron2.position.x = 1.5;
scene.add( icosahedron2 );

//アニメーション
function animate() {
    requestAnimationFrame( animate );

    icosahedron1.rotation.y += 0.05;
    icosahedron2.rotation.y += 0.05;

    controls.update();

    renderer.render( scene, camera );
}

animate();
描画してみます。ドラッグしてクルクルすると座標(0,0,0)を中心に回転することがわかります。
今回はOrbitControls(オービットコントロール)の使い方を確認できました。
