CodeIgniter 4 ログイン認証のチュートリアル
このチュートリアルではCodeIgniter4でのログイン認証システムの作成方法を解説しています。サインアップ、ログイン、ログアウトという一連の流れを確認します。
CodeIgniter4のプロジェクトの作成
このチュートリアルではCodeIgniter4でログイン認証システムを作成していきます。サインアップ画面で名前、メールアドレス、パスワードを登録し、ログイン画面ではメールアドレスとパスワードで認証を行います。
サーバーはXAMPPを使用します。CodeIgniter4のダウンロードにはComposerを使用しますので事前にインストールしておきます。
まずプロジェクトを作成します。XAMPPのhtdocsに移動し下記コマンドを実行します。今回のプロジェクト名はauth-tutorialとします。
CodeIgniter4のプロジェクトの作成
composer create-project codeigniter4/appstarter auth-tutorial
開発モードに設定していきます。テキストエディターでenvファイルを.envにリネームしCI_ENVIRONMENTをdevelopmentに、app.baseURLを'http://localhost/auth-tutorial/public'に設定します。

データベースの作成とCodeIgniter4との接続設定
ログイン認証システム用のデータベースを作成します。このチュートリアルではデータベース名をtestdbに、テーブル名はusersにします。phpMyAdminで作成していきます。下記コマンドでデータベースを作成します。
データベースtestdbの作成
CREATE DATABASE testdb;
次にテーブルを作成します。
usersテーブルの作成
CREATE TABLE `testdb`.`users` (
`id` INT NOT NULL AUTO_INCREMENT ,
`name` VARCHAR(255) NOT NULL ,
`email` VARCHAR(255) NOT NULL ,
`password` VARCHAR(255) NOT NULL ,
`created_at` DATETIME NOT NULL DEFAULT CURRENT_TIMESTAMP ,
`updated_at` DATETIME on update CURRENT_TIMESTAMP NOT NULL DEFAULT CURRENT_TIMESTAMP ,
PRIMARY KEY (`id`)
) ENGINE = InnoDB CHARSET=utf8mb4 COLLATE utf8mb4_general_ci;
created_atは登録日時を、updated_atは最終更新日時を保存するためのフィールドです。データベースが作成できたのでCodeIgniter4で接続するために.envファイルのデータベースの項目を設定します。

ホスト名、データベース名、ユーザー名、パスワードはそれぞれの環境にあわせて変更してください。これでデータベースの設定も完了です。
UserModelファイルの作成
UserModelファイルを作成します。まず下記コマンドを実行します。
UserModel.phpの作成
php spark make:model User --suffix
app/Models内にひな形が生成されるので下記のように修正します。
app/Models/UserModel.php
<?php

namespace App\Models;

use CodeIgniter\Model;

class UserModel extends Model
{
    protected $DBGroup          = 'default';
    protected $table            = 'users';
    protected $primaryKey       = 'id';
    protected $useAutoIncrement = true;
    protected $insertID         = 0;
    protected $returnType       = 'array';
    protected $useSoftDeletes   = false;
    protected $protectFields    = true;
    protected $allowedFields    = ['name', 'email', 'password'];

    // Dates
    protected $useTimestamps = false;
    protected $dateFormat    = 'datetime';
    protected $createdField  = 'created_at';
    protected $updatedField  = 'updated_at';
}
これでUserModel.phpの完成です。
AuthControllerファイルの作成
AuthControllerファイルを作成します。まず下記コマンドを実行します。
AuthController.phpの作成
php spark make:controller Auth --suffix
app/Controllers内にひな形が生成されるので今回は下記の7つのメソッドを作成していきます。
- index() トップページの表示
- register() アカウント登録画面の表示
- store() 新しいアカウントをデータベースに保存
- login() ログイン画面の表示
- loginAuth() ログインの認証
- dashboard() ログイン認証後のダッシュボード画面の表示
- logout() ログアウトしトップページに戻る
下記のように作成します。
app/Controllers/AuthController.php
<?php

namespace App\Controllers;

use App\Controllers\BaseController;
use App\Models\UserModel;

class AuthController extends BaseController
{
    public function __construct()
    {
        helper(['form', 'url']);
        $this->session = ConfigServices::session();
    }

    public function index()
    {
        return view('home');
    }

    public function register()
    {
        return view('authview/register');
    }

    public function store()
    {
        $rules = [
            'name' => 'required|min_length[2]',
            'email' => 'required|valid_email|is_unique[users.email]',
            'password' => 'required|min_length[8]'
        ];

        if ($this->validate($rules)) {
            $userModel = new UserModel();
            $data = [
                'name' => $this->request->getVar('name'),
                'email' => $this->request->getVar('email'),
                'password' => password_hash($this->request->getVar('password'), PASSWORD_DEFAULT)
            ];

            $userModel->save($data);
            session()->setFlashdata('msg' ,'アカウントが登録されました!新規アカウントでログインできます。');
            return redirect()->to(base_url('/'));
        } else {
            $data['validation'] = $this->validator;
            return view('authview/register', $data);
        }
    }

    public function login()
    {
        return view('authview/login');
    }

    public function loginAuth()
    {
        $userModel = new UserModel();

        $email = $this->request->getVar('email');
        $password = $this->request->getVar('password');

        $user = $userModel->where('email', $email)->first();

        if ($user) {
            $hashedPass = $user['password'];
            $authPassword = password_verify($password, $hashedPass);
            if ($authPassword) {
                $ses_data = [
                    'id' => $user['id'],
                    'name' => $user['name'],
                    'email' => $user['email'],
                    'created_at' => $user['created_at'],
                    'updated_at' => $user['updated_at'],
                    'isLoggedIn' => true,
                ];

                session()->set($ses_data);
                return redirect()->to('dashboard');
            } else {
                session()->setFlashdata('msg', 'パスワードが違います。');
                return redirect()->to('login');
            }
        } else {
            session()->setFlashdata('msg', '該当するメールアドレスがありません');
            return redirect()->to('login');
        }
    }

    public function dashboard()
    {
        return view('authview/dashboard');
    }

    public function logout()
    {
        session()->destroy();
        return redirect()->to('/');
    }
}
use App\Models\UserModel;でUserModelを読み込みます。
コンストラクタのhelper(['form','url']);でヘルパーファンクションを呼び出しています。
session()もいくつかのメソッドで使用するので宣言しています。
index()はhomeビューを表示します。register()はregisterビューを表示します。store()は新規アカウントの値を検証しデータベースに保存します。値が不正な場合はリダイレクトします。login()はloginビューを表示します。loginAuth()はメールアドレスとパスワードを認証します。不正な値が入力された場合はリダイレクトします。dashboard()はdashboardビューを表示します。logout()はセッションデータを破棄してログアウトし、homeビューへリダイレクトします。
AuthGuardFilterファイルの作成
ログインしている場合のみdashboardビューにアクセスできるようにフィルターを設定します。まず、app/Config/Filters.phpの$aliasesの配列に'authGuard'を追加して下記のようにします。
app/Config/Filters.php抜粋
namespace Config;

use CodeIgniter\Config\BaseConfig;
use CodeIgniter\Filters\CSRF;
use CodeIgniter\Filters\DebugToolbar;
use CodeIgniter\Filters\Honeypot;

class Filters extends BaseConfig
{
    /**
     * Configures aliases for Filter classes to
     * make reading things nicer and simpler.
     *
     * @var array
     */
    public $aliases = [
        'csrf'     => CSRF::class,
        'toolbar'  => DebugToolbar::class,
        'honeypot' => Honeypot::class,
        'authGuard' => \App\Filters\AuthGuardFilter::class,
    ];
次にapp/Filters内にAuthGuardFilter.phpを作成します。フィルターファイルもsparkコマンドでひな形を作成できるので、下記コマンドを実行します。
AuthGuardFilterの作成
php spark make:filter AuthGuard --suffix
before()メソッドに処理を書いていきます。ログインしていない状態でdashboardビューへアクセスしようとした場合に、loginビューへリダイレクトする処理を記述します。下記のようになります。
app/Filters/AuthGuardFilter.php
<?php

namespace AppFilters;

use CodeIgniterFiltersFilterInterface;
use CodeIgniterHTTPRequestInterface;
use CodeIgniterHTTPResponseInterface;

class AuthGuardFilter implements FilterInterface
{
    public function before(RequestInterface $request, $arguments = null)
    {
        if (!session()->get('isLoggedIn')) {
            return redirect()->to('login');
        }
    }

    public function after(RequestInterface $request, ResponseInterface $response, $arguments = null)
    {
        //
    }
}
これでフィルターが作成できたので次にルーティングを設定していきます。
Routingの設定
ルーティングを設定します。app/Config/Routes.phpのRoute Definitionsの部分を下記のようにします。
app/Config/Routes.php抜粋
$routes->get('/', 'AuthController::index');
$routes->get('register', 'AuthController::register');
$routes->post('register', 'AuthController::store');
$routes->get('login', 'AuthController::login');
$routes->post('login', 'AuthController::loginAuth');
$routes->get('dashboard', 'AuthController::dashboard', ['filter' => 'authGuard']);
$routes->get('logout', 'AuthController::logout');
$routes->get('dashboard', 'AuthController::dashboard', ['filter' => 'authGuard']);��の部分で先ほど作成したフィルターを使用しています。あとはそれぞれのViewファイルを作成していきます。
Viewファイルの作成
このチュートリアルではView Layoutsを使用してファイルを構成します。app/Viewの直下にhome.phpとサブフォルダのauthviewとlayoutsを作成します。authview内にはdashboard.php、login.php、register.phpを作成します。layouts内にbase.phpを作成します。下記のような構成になります。
- authview
- dashboard.php
- login.php
- register.php
- layouts
- base.php
- home.php
このチュートリアルではCSSフレームワークのPico.css(https://picocss.com)を使用しますが、CSSはお好みでどうぞ。
それではまずベースとなるbase.phpを作成します。
app/Views/layouts/base.php
<!DOCTYPE html>
<html lang="en" dir="ltr">
<head>
  <meta charset="utf-8">
  <meta name="viewport" content="width=device-width, initial-scale=1.0">
  <meta http-equiv="X-UA-Compatible" content="ie=edge">
  <link rel="stylesheet" href="https://unpkg.com/@picocss/pico@latest/css/pico.min.css">
  <title>CodeIgniter 4 ログイン認証のチュートリアル</title>
</head>
<body>
  <div class="container">
      <h1>CodeIgniter 4 ログイン認証のチュートリアル</h1>
      <?= $this->renderSection('content') ?>
  </div>
</body>
</html>
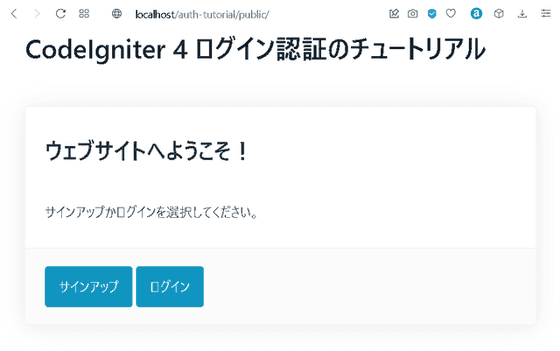
トップページとなるhome.phpを 作成します。ログイン画面とアカウント登録画面へのリンクがあるだけのシンプルなつくりです。下記のように作成します。articleタグを使用していますが、これはPico.cssでカードコンポーネントを表示するための書き方です。
app/Views/home.php
<?= $this->extend('layouts/base'); ?>

<?= $this->section('content') ?>
<article>
    <?php if (session()->getFlashdata('msg')): ?>
        <p><mark><?= session()->getFlashdata('msg') ?></mark></p>
    <?php endif; ?>
    <h3>ウェブサイトへようこそ!</h3>
    <p>
      サインアップかログインを選択してください。
    </p>
    <footer>
      <a href="<?= base_url('register') ?>"role="button">サインアップ</a>
      <a href="<?= base_url('login') ?>" role="button">ログイン</a>
    </footer>
</article>
<?= $this->endSection() ?>
アカウント登録画面のregister.phpを下記のように作成します。このチュートリアルではvalidationのメッセージがリストで表示されるようにしています。
app/Views/authview/register.php
<?= $this->extend('/layouts/base'); ?>

<?= $this->section('content') ?>
<?php if (session()->getFlashdata('msg')): ?>
    <p><mark><?= session()->getFlashdata('msg') ?></mark></p>
<?php endif; ?>

<?php $validation = ConfigServices::validation(); ?>

<article>
    <form action="<?= base_url('register') ?>" method="post">
        <h3>アカウント登録</h3>

        <?php if (isset($validation)): ?>
            <div><?= $validation->listErrors() ?></div>
        <?php endif; ?>

        <label for="name">お名前</label>
        <input type="text" name="name" value="<?= set_value('name') ?>">

        <label for="email">メールアドレス</label>
        <input type="email" name="email" value="<?= set_value('email') ?>">

        <label for="password">パスワード</label>
        <input type="password" name="password" value="<?= set_value('password') ?>">

        <input type="submit" name="submit" value="サインアップ">
    </form>
</article>
<?= $this->endSection() ?>
ログイン画面のlogin.phpを下記のように作成します。
app/Views/authview/login.php
<?= $this->extend('/layouts/base'); ?>

<?= $this->section('content') ?>
<article>
    <form action="<?= base_url('login') ?>" method="post">
        <h3>ログイン</h3>

        <?php if (session()->getFlashdata('msg')): ?>
            <p><mark><?= session()->getFlashdata('msg') ?></mark></p>
        <?php endif; ?>

        <label for="email">メールアドレス</label>
        <input type="email" name="email" value="<?= set_value('email') ?>">

        <label for="password">パスワード</label>
        <input type="password" name="password" value="<?= set_value('password') ?>">

        <input type="submit" name="submit" value="ログイン">
    </form>
</article>
<?= $this->endSection() ?>
ログイン後にユーザー情報が表示されるdashboard.phpを下記のように作成します。ログアウトボタンを押すとセッションが破棄され、トップページに戻ります。
app/Views/authview/dashboard.php
<?= $this->extend('/layouts/base'); ?>

<?= $this->section('content') ?>
<h3>ダッシュボード</h3>
<p>あなたの情報</p>
<article>
    <ul>
        <li>ID:<?= session()->get('id') ?></li>
        <li>名前:<?= session()->get('name') ?></li>
        <li>メールアドレス:<?= session()->get('email') ?></li>
        <li>アカウントの登録日時:<?= session()->get('created_at') ?></li>
        <li>アカウントの最終更新日:<?= session()->get('updated_at') ?></li>
    </ul>
    <a href="<?= base_url('logout') ?>" role="button">ログアウト</a>
</article>
<?= $this->endSection() ?>
これでCodeigniter4でのシンプルなログイン認証システムの完成です。
アプリケーションの実行
動作を確認しておきましょう。XAMPPでApacheとMySQLを起動し、ブラウザでhttp://localhost/auth-tutorial/public/にアクセスします。トップページが表示されます。
サインアップボタンからアカウント登録画面に移動します。
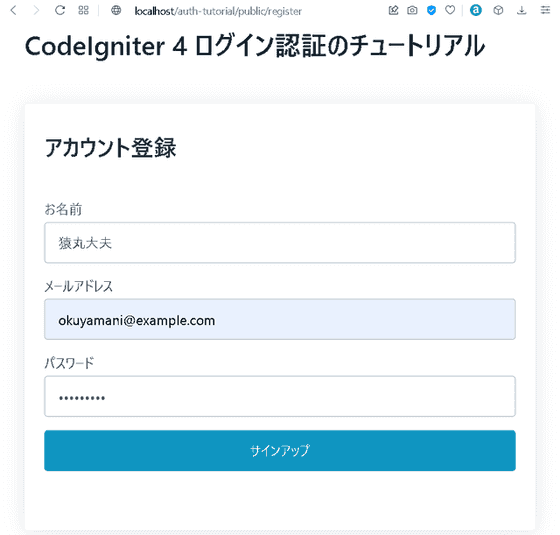
情報を入力しサインアップボタンを押します。

トップページにリダイレクトされ、メッセージが表示されています。次にログインボタンからログイン画面に移動します。
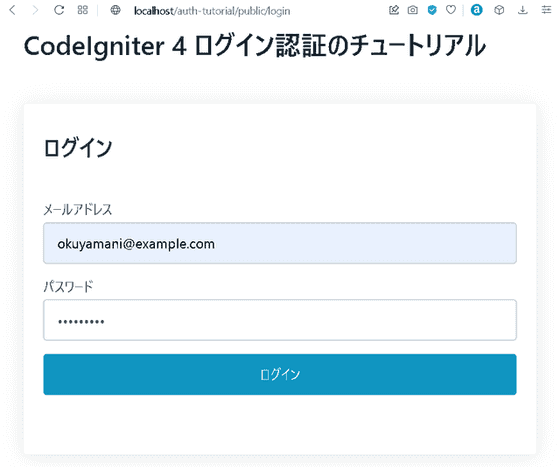
メールアドレスとパスワードを入力しログインボタンを押します。
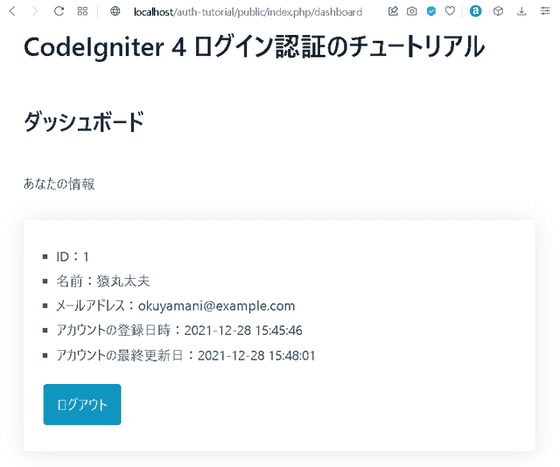
ダッシュボードが表示されました。今回のチュートリアルは以上となります。シンプルなログイン認証システムが作成できました。CodeIgniter 4 に興味のある方の参考になれば幸いです。